Groups
In the Groups widget (Plugins > Napari Track Edit > Widget - Groups) you
can create groups of nodes that you want to store to review later, for example because
these are of particular interest, need to be corrected, or belong to a specific
object/cell type.
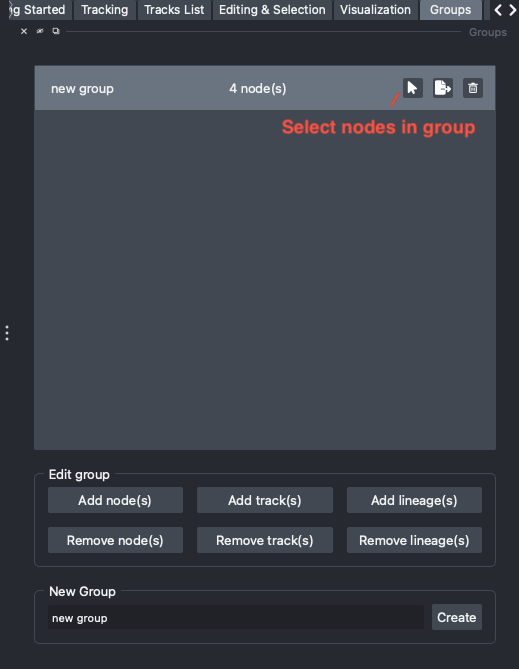
Creating groups of nodes.
Creating groups
Type a name in the New Group field and click Create. The new group is added to the
list of groups and selected. Each entry in the list shows the name of the group, the
number of nodes it contains, and three buttons:
the mouse pointer button selects all nodes in the group, so that you can always go back to them;
the export button exports the nodes in the group (and their ancestors) to CSV or geff (see Exporting tracks);
the trash can button deletes the group (the nodes themselves are not deleted).
Adding and removing nodes
Select a group in the list, and use the buttons in the Edit group section to add or
remove nodes, based on the current node selection:
Add node(s)/Remove node(s): add or remove only the selected nodes.Add track(s)/Remove track(s): add or remove all nodes in the tracks of the selected nodes.Add lineage(s)/Remove lineage(s): add or remove all nodes in the lineages of the selected nodes.
A convenient way to fill a group is to sort the Table by a feature, select a range of
rows, and add those nodes to a group.
Using groups
Display: set the
Display Modein theVisualizationwidget toGroup(or pressQuntil the mode is ‘Group’) to restrict the napari layers to the nodes in the currently selected group. See Viewing all nodes vs. selected lineages.Color: groups are also available in the
Color bydropdown menu of theVisualizationwidget, to highlight the nodes in a group in all views.Export: exporting a group writes the nodes in that group together with all their ancestors, so that the exported lineages stay intact. This way you can analyze a subset of the tracks in other tools.
Groups are stored with the tracks, so they are kept when you save and load your tracks.